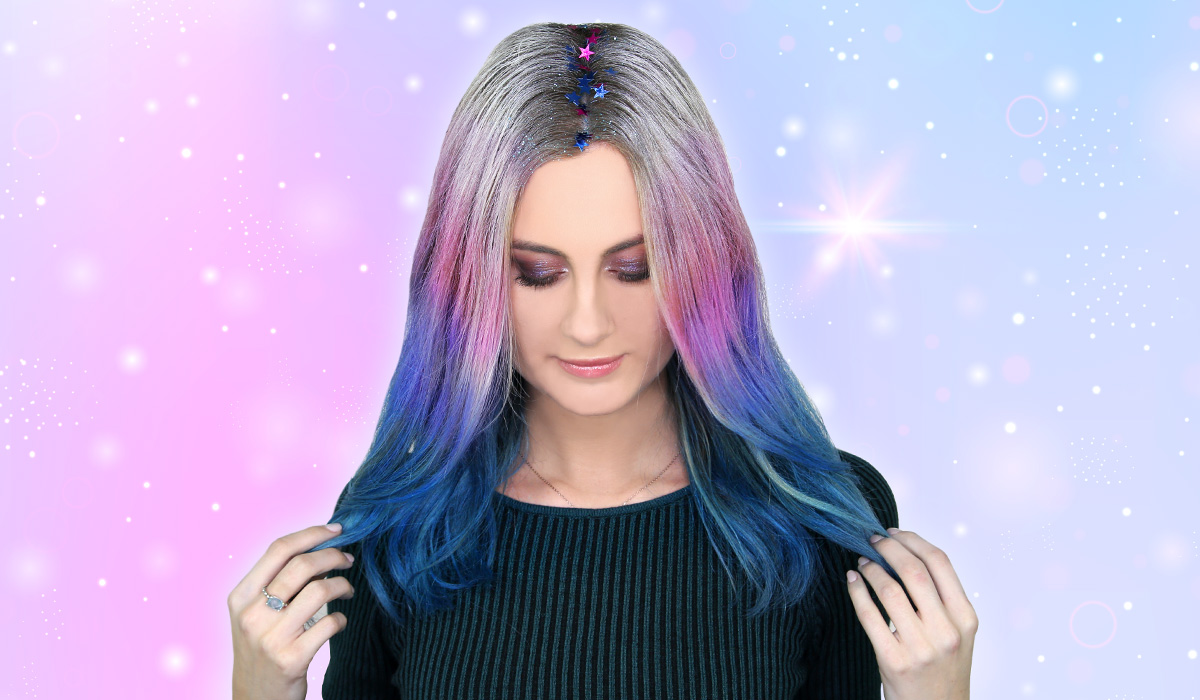
Thanks to social media, we’ve all become obsessed with multi-coloured hair trends – but none more so than unicorn hair. Just like My Little Pony but with a grown-up twist, unicorn hair features an array of bright, fun colours that creates one seriously head-turning look.
But if you’re not ready to really commit and bleach your hair, don’t worry – you can still do DIY unicorn hair at home. That’s right, our unicorn hair colour tutorial will show you how to get unicorn hair without having to permanently dye it. Ready? Let’s get ethereal.
Step 1: Choose the right products

To start, we’ve chosen hair colour products that will provide the ultimate unicorn hair look, without the commitment – the Schwarzkopf LIVE Colour Spray range! There are six vibrant shades to choose from and the colours work on both light and dark hair.
But best of all, the shades only last for one wash, so you can be as creative as you want to be without being stuck with a single colour. No bleaching, no damage, just enviable colour that can take you from pink hair one day to purple the next – hello hair transformation!
The great thing about unicorn hair is that you can choose any colour you want. For this unicorn hair look, we’ve chosen to use four colours from the Schwarzkopf LIVE Colour Spray range – Schwarzkopf LIVE Colour Spray – Silver Splash, Candy Pink, Purple Kiss and Blue Twist.
Step 2: Colour your roots

For this look we’ve decided to graduate the colour throughout the hair, with the lightest at the roots and the darkest at the ends, for that real unicorn vibe. Using the Schwarzkopf LIVE Colour Spray – Silver Splash shade, spray the colour onto the roots of your hair, until you reach your eye level. Don’t worry about any drips or mess though – the Schwarzkopf LIVE Colour Sprays dry straight away so won’t run.
Step 3: Start the colour transition

Once you’ve coloured your roots silver, it’s time to go pink with the Schwarzkopf LIVE Colour Spray – Candy Pink shade. Gently spray the pink onto the next section of your hair, starting at eye level and finishing just above your jawline. One spray is enough for a pastel pink, but you can also layer and build the colour up if you want to intensify the shade.
Step 4: Add colour to the mid-lengths of your hair

Now we’re going purple! From just underneath your chin, spray the Schwarzkopf LIVE Colour Spray – Purple Kiss onto the hair. Don’t worry about trying to make the colours fade perfectly into one another – we’ll get to that soon.
Step 5: Finish off your ends

With the darkest shade, Schwarzkopf LIVE Colour Spray – Blue Twist, spray the colour onto the ends of your hair. Focus on spraying the most colour at the very ends of the hair for that gradient vibe. And you’re done colouring! It’s really that easy.
Step 6: Blend it out

Run a comb through the hair to make the colours blend seamlessly together – like magic!
Step 7: Style your hair as you like

To make this unicorn look extra magical, we added some glitter and stars to the hair part and twisted back two pieces of hair from around the face. Or, leave the front out to make the unicorn colours really take centre stage.

Would you try unicorn hair colour?


